glittery/asymmetrical/chunky earwarmer

materials

  • 10.00 mm crochet hook
  • 29 yds/26.5 m – 35 yds/32m super bulky yarn 
  • 29 yds/26.5 m – 35 yds/32m vanna’s glamour yarn

key

ch-chain

dc- double crochet

fpdc- front post double crochet

bpdc- back post double crochet

pattern

Row 1: With both chunky and Vanna’s Glamour yarns together, ch 38 (this gave me about 19″, a length the fits my head snuggly but not too tightly, you may have to adjust accordingly, any EVEN ch count will work), sl st in starting ch to join. Do not twist.

Row 2: ch 3 (counts as first dc), dc in each st around, sl st into top of ch 3 to join

Row 3: repeat row 2

Row 4: ch 3, alternate fpdc/bpdc around, sl st into top of ch 3 to join

Rows 5-6: repeat row 4, ensure fpdc stitches align with prior row, finish off.

you may add extra fpdc/bpdc rows to achieve the width you prefer. If you can’t live without symmetry, add a final row with regular dc in each st around.

arrow crochet bandeau straps

Materials

size G (4mm crochet hook)

1/4 skein Vanna’s Glamour Yarn

Yarn Needle

Lace Bandeau (see below)

Key

  • ch-chain
  • sc-single crochet
  • dc-double crochet
  • tc-treble crochet (y over 2)
  • dtr-double treble crochet (y over 3)
  • trtr-triple treble crochet (y over 4)
  • quadtr-quadruple treble (y over 5)
  • quintr-quintuple treble (y over 6)
  • sexttr- y over 7
  • septtr- y over 8
  • octtr- y over 9
  • nontr- y over 10
  • dectr- y over 11
  • undectr- y over 12
  • duodectr- y over 13
  • tredectr- y over 14
  • quattourdectr- y over 15
  • quindectr- y over 16
  • sexdectr- y over 17

Pattern

LARGE ARROW

Start: ch 36

Row 1: sc across, beginning in 2nd ch from hook (35 st)

Row 2: sc, ch, dc in next sp (do not skip stitches, even though you ch in between), ch, tc, ch, dtr, ch, trtr, ch, quadtr, ch, quintr, ch, sexttr, ch, septtr, ch, octtr, ch, nontr, ch, dectr, ch, undectr, ch, duodectr, ch, tredectr, ch, quattourdectr, ch, quindectr, ch, sexdectr, ch, quindectr, ch, quattourdectr, ch, tredectr, ch, duodectr, ch, undectr, ch, dectr, ch, nontr, ch, octtr, ch, septtr, ch, sexttr, ch, quintr, ch, quadtr, ch, trtr, ch, dtr, ch, tc, ch, dc, ch, sc

I would never be able to understand this pattern how I just wrote it^^, but in case you think that way, great. For the rest of us, let me break down row two into stitches for you. If it helps, print this out and check each one off as you go!

St 1: sc, ch

St 2: dc, ch

St 3: tc, ch

St 4: y over 3, ch

St 5: y over 4, ch

St 6: y over 5, ch

St 7: y over 6, ch

St 8: y over 7, ch

St 9: y over 8, ch

St 10: y over 9, ch

St 11: y over 10, ch

St 12: y over 11, ch

St 13: y over 12, ch

St 14: y over 13, ch

St 15: y over 14, ch

St 16: y over 15, ch

St 17: y over 16, ch

St 18: y over 17, ch

St 19: y over 16, ch

St 20: y over 15, ch

St 21: y over 14, ch

St 22: y over 13, ch

St 23: y over 12, ch

St 24: y over 11, ch

St 25: y over 10, ch

St 26: y over 9, ch

St 27: y over 8, ch

St 28: y over 7, ch

St 29: y over 6, ch

St 30: y over 5, ch

St 31: y over 4, ch

St 32: y over 3, ch

St 33: tc, ch

St 34: dc, ch

St 35: sc

Row 3: ch 1, *sc, sc in ch sp, repeat from * across

Row 4: ch 2, dc across

Finish off

SMALL ARROW

Start: ch 16

Row 1: sc across, beginning in 2nd ch from hook (15 st)

Row 2:

St 1: sc, ch

St 2: dc, ch

St 3: tc, ch

St 4: y over 3, ch

St 5: y over 4, ch

St 6: y over 5, ch

St 7: y over 6, ch

St 8: y over 7, ch

St 9: y over 6, ch

St 10: y over 5, ch

St 11: y over 4, ch

St 12: y over 3, ch

St 13: tc, ch

St 14: dc, ch

St 15: sc

Row 3: ch 1, *sc, sc in ch sp, repeat from * across

Row 4: ch 2, dc across

Finish off

STRAPS (MAKE 2):

Start: ch 5

Row 1: dc across, beginning in 3rd ch from hook

Row 2-?: repeat as needed until you have enough length to reach from your shoulder to 2″ above your sternum

I needed 12 rows in total.

ASSEMBLY

Find the half of each arrow, then use embroidery needle to sew them together at the apex

Attach straps at the corners of the small arrow

Afix large arrow to bralette – 6.5″ apart (don’t sew straight across or you will lose the effect)

Sew free ends of straps to the center of the bust of the bralette, ensuring not to twist.

boho bling slouchie

Materials

  • 1 skein lace-weight (2 ply) mohair yarn
  • Size G (4mm) crochet hook
  • embroidery needle (optional)
  • 24 medium-size beads (optional)

Key

ch – chain

sk sp – skip space

sc – single crochet

dc – double crochet

sk 1 ch sp – skip an entire ch space between dc clusters

sl st – slip stitch

Pattern

Row 1: Start a granny square- ch 3, 2 dc in 3 ch from hook, 2 ch, 3 dc in same space, 2 ch, 3 dc in same space, 2 ch, 3 dc, 2 ch, sl st to join

Row 2: ch 3, 2 dc in sp, *ch 1, 3 dc in next sp, ch 2, 3 dc in same sp* repeat between *s 2 more times, 3 dc in next sp, ch 2, sl st in 3rd st of starting ch to join

Row 3 – 8 : continue granny square pattern around: 3 dc in each sp, ch between dc clusters. At the corners, you will continue to make 2 clusters of 3 dc separated by 2 ch in each.

Row 9: Begin row as normal (alternate 3 dc, ch 1 across to the next corner) then make this pattern in the ch 2 sp of the corner: 3 dc, ch, 3 dc, ch, 3dc, ch. Repeat on next 2 corners. At last corner: 3 dc, ch, 3 dc, ch, sl st to join in top of starting chain

Row 10: Begin row from the corner space created by sl st in Row 9 (ch 3, 2 dc in sp). ch 1, 3 dc in next ch sp, ch 1, *sk 1 ch sp, 3 dc, ch, 3 dc, ch, 3 dc, ch, 3 dc, ch* repeat between *s 6 more times, treating corner ch sp like an edge (only 3 dc in each). sk 1 ch sp, 3 dc, ch, 3 dc, ch, sl st into top of ch

Row 11: Begin row from the corner space created by sl st in Row 10 (ch 3, 2 dc in sp), ch 1, 3 dc in next ch sp, ch 1, 3 dc, ch 1, * sk 1 ch sp, 3 dc, ch 1, sk 1 ch sp, ch 1, 3 dc, ch 1, 3 dc, ch 1, 3 dc, ch 1, 3 dc, ch 1, 3 dc, ch 1* repeat between *s 2 times, sk 1 ch sp, 3 dc, ch 1, sk 1 ch sp, ch 1, 3 dc, ch 1, 3 dc, ch 1, sl st in top of ch to join

Row 12- 25: Continue granny square pattern around (alternate 3 dc in each ch sp, ch 1). Do not add any stitches/clusters at the corners, you are now working in the round, effectively.

Row 26: ch 1, make 4 sc in each ch sp around, sl st in starting ch to join.

Row 27-32: ch 1, sc around, sl st into first st of row to join

Row 33: ch 3, make 2 dc in same st, ch 1, sk 3 st, *3 dc in sp, ch 1, sk 3 st, repeat from * around and slip st to join in top of ch

Finishing

Use an embroidery needle and the remaining yarn (or coordinating thread) to secure beads around the brim of that hat at the center of each group of 3 dc in row 33. Weave in ends.

triple tucked crochet sweater

Materials

  • US G (4mm) crochet hook
  • 200 – 250 grams of DK weight
  • yarn (11 wpi) (744 – 930 yards)
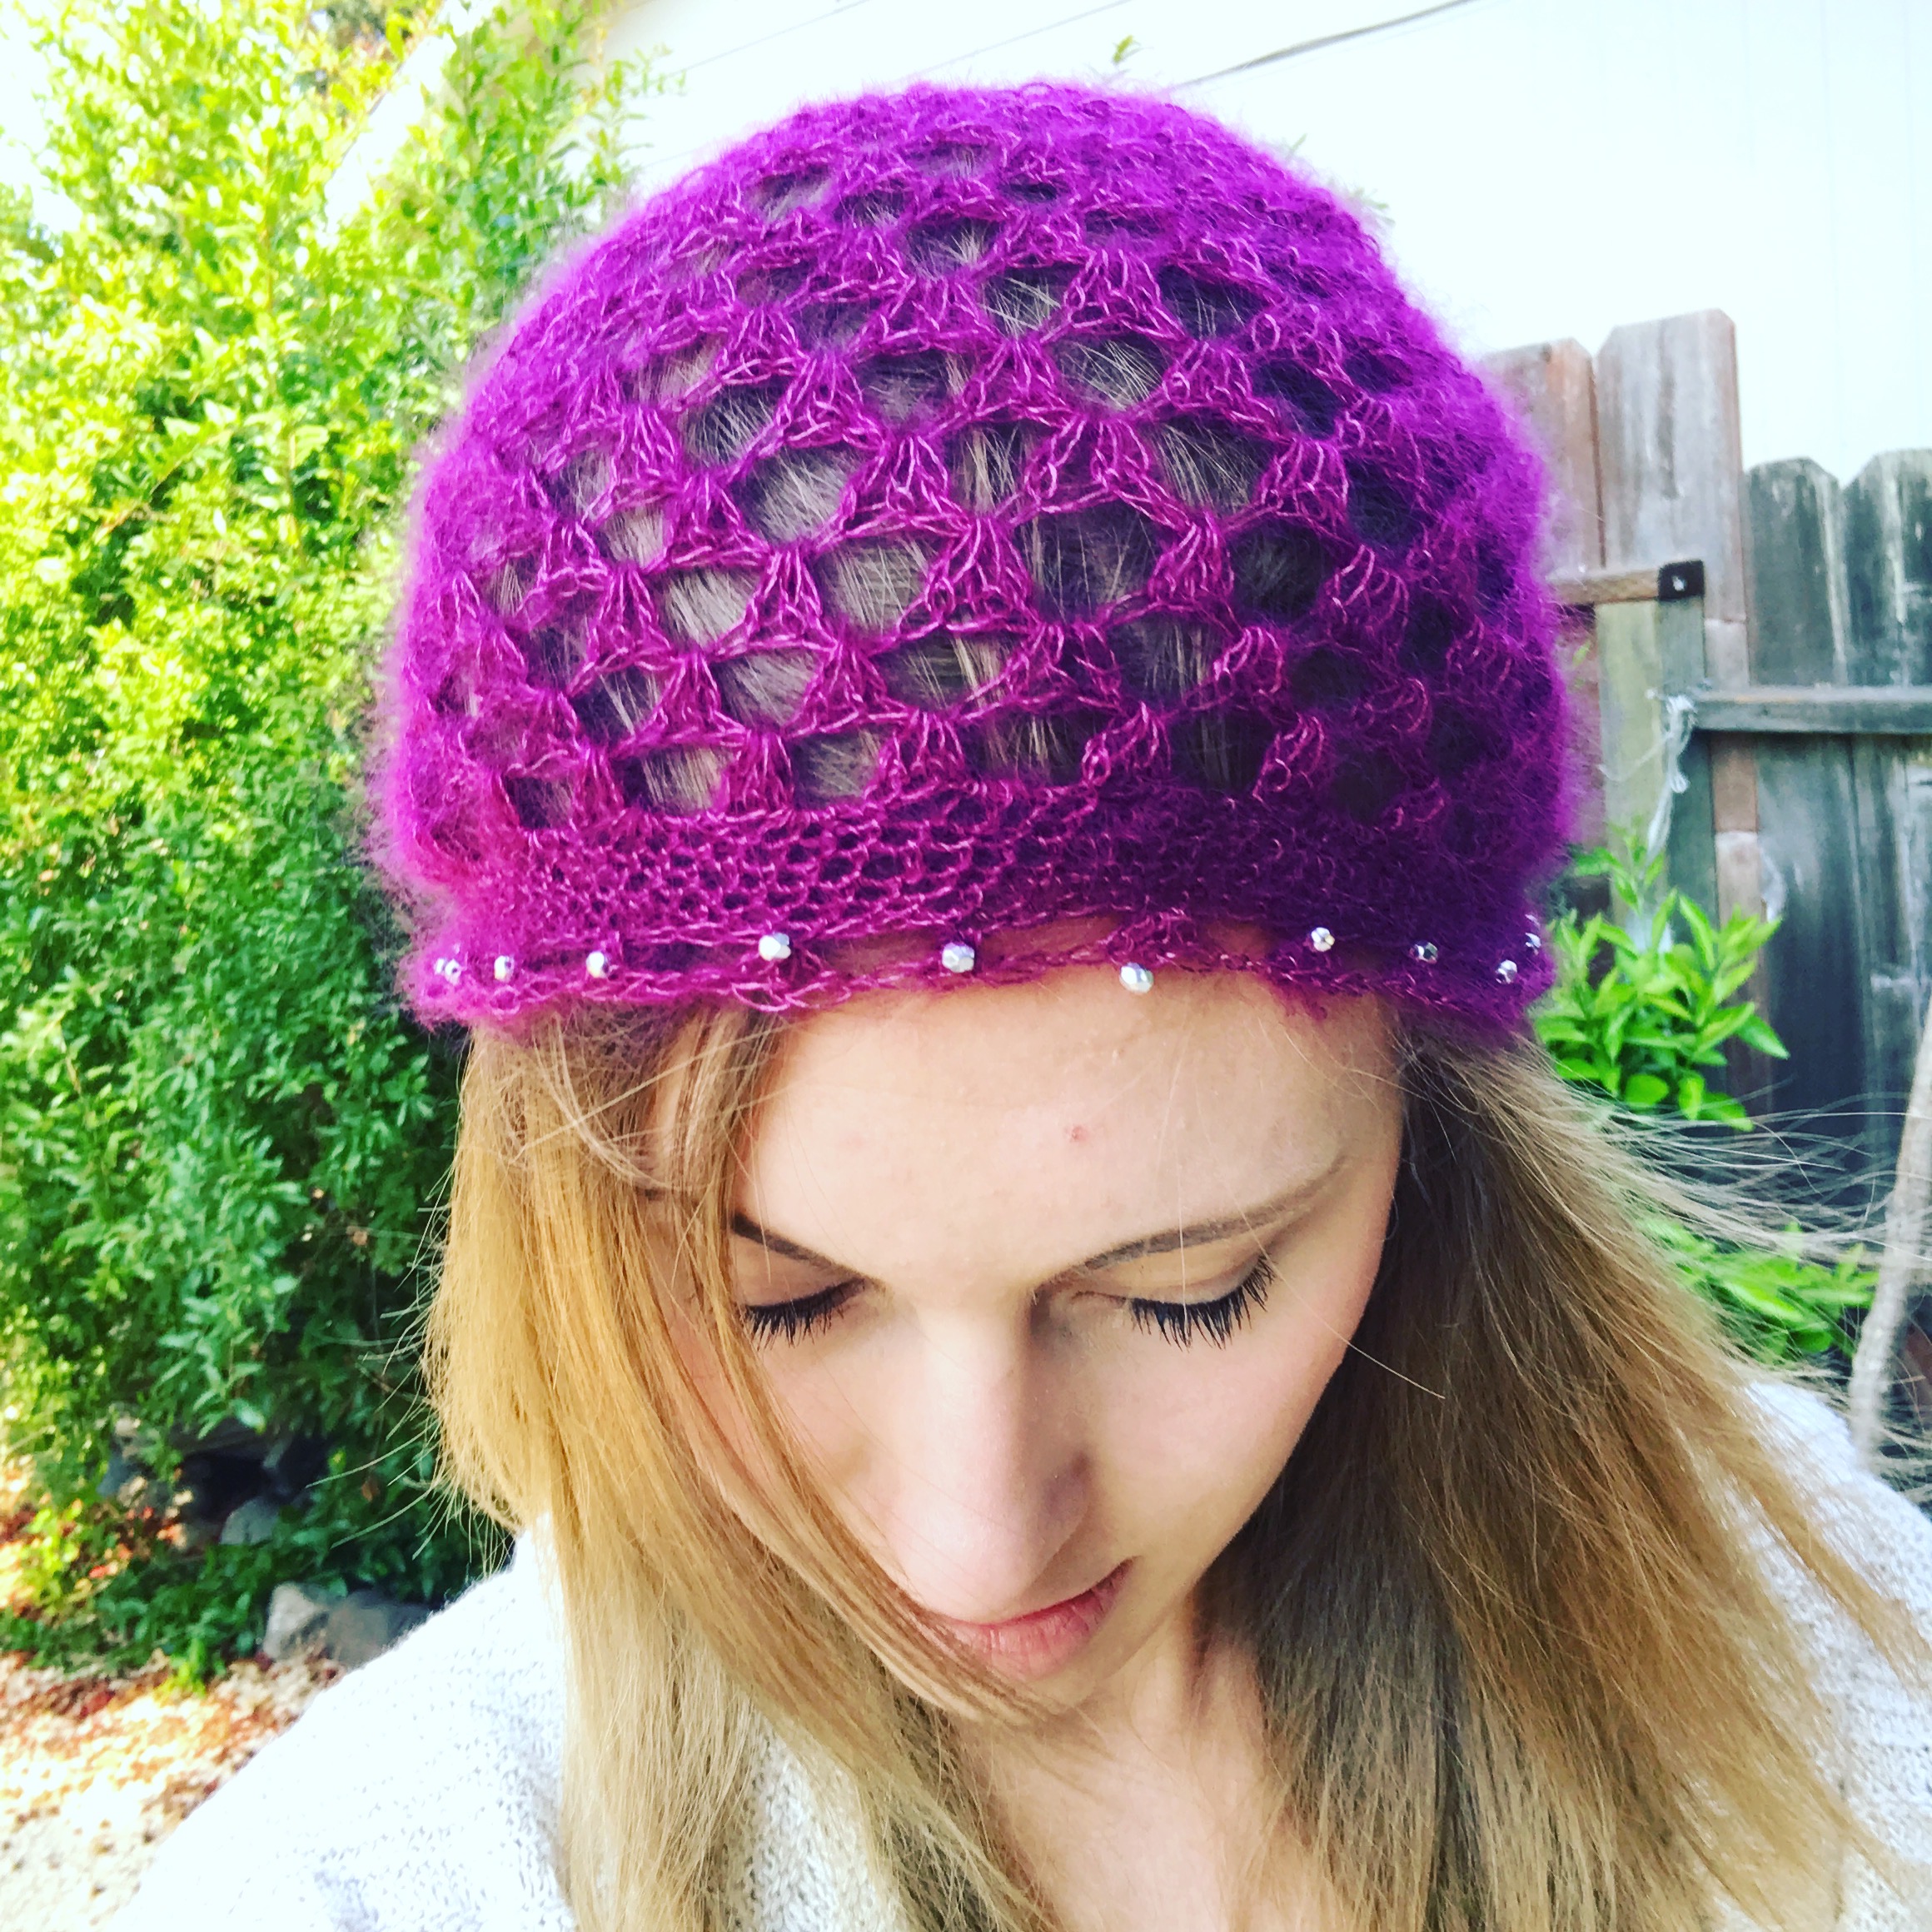
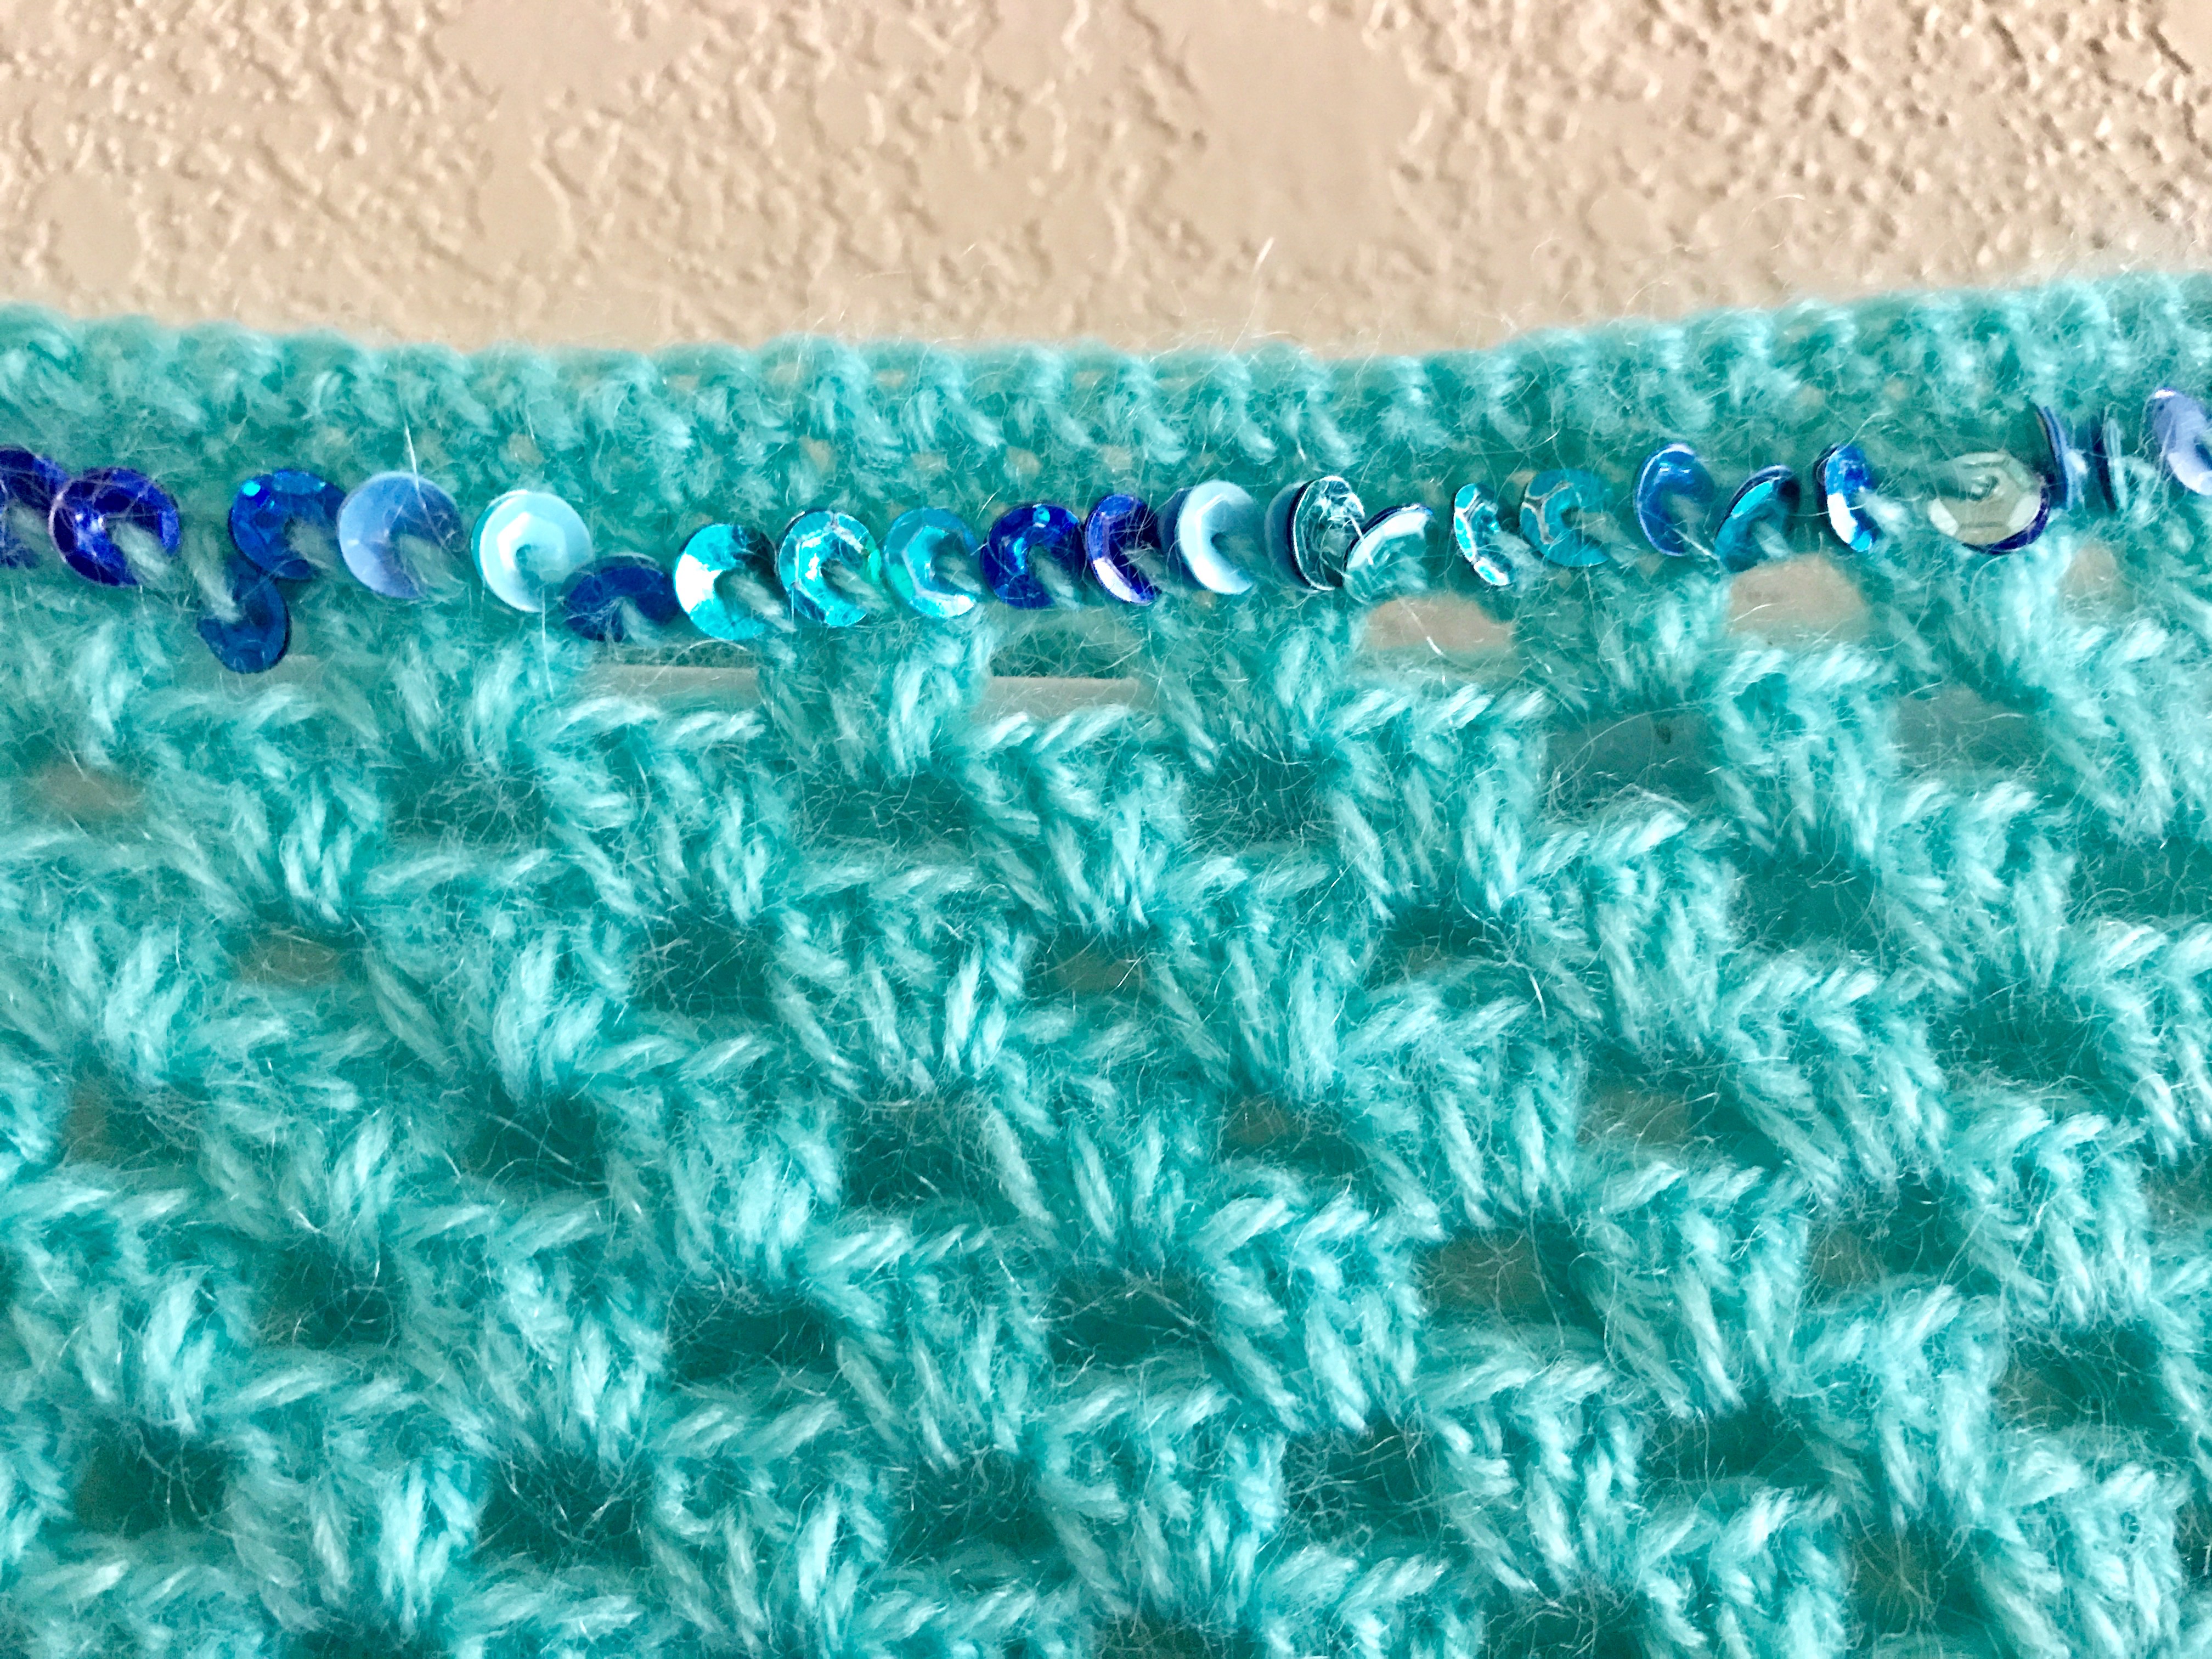
  • sequins or small beads
  • embroidery needle
  • yarn needle

The designated amount of yarn is vague because it will be dependent on the size of your granny squares (see sizing info on Page 3). I used 4 skeins 200 g/740 yards to make a sweater constructed from squares 22″ x 22″ in size. Add an extra skein for roughly every additional 3″ in square size after this:

  • 23″- 25″ squares = 5 skeins
  • 26″-28″ squares = 6 skeins

You can use beads instead of sequins for the collar detail (or forgo entirely), In which case you will need to pre-string your yarn accordingly.

Key

ch- chain

sc- single crochet

dc- double crochet

fpdc- front-post double crochet

bpdc- back-post double crochet

Sweater Front/Back

Make 2 Granny Squares of equal size, determined using this formula: Take your waist measurement + 16 inches (40 cm), then divide by 2. For example, in my case, adding 16″ to my waist measurement of 28″ is 44″. I divided that by 2 and made each square to be 22″ x 22″

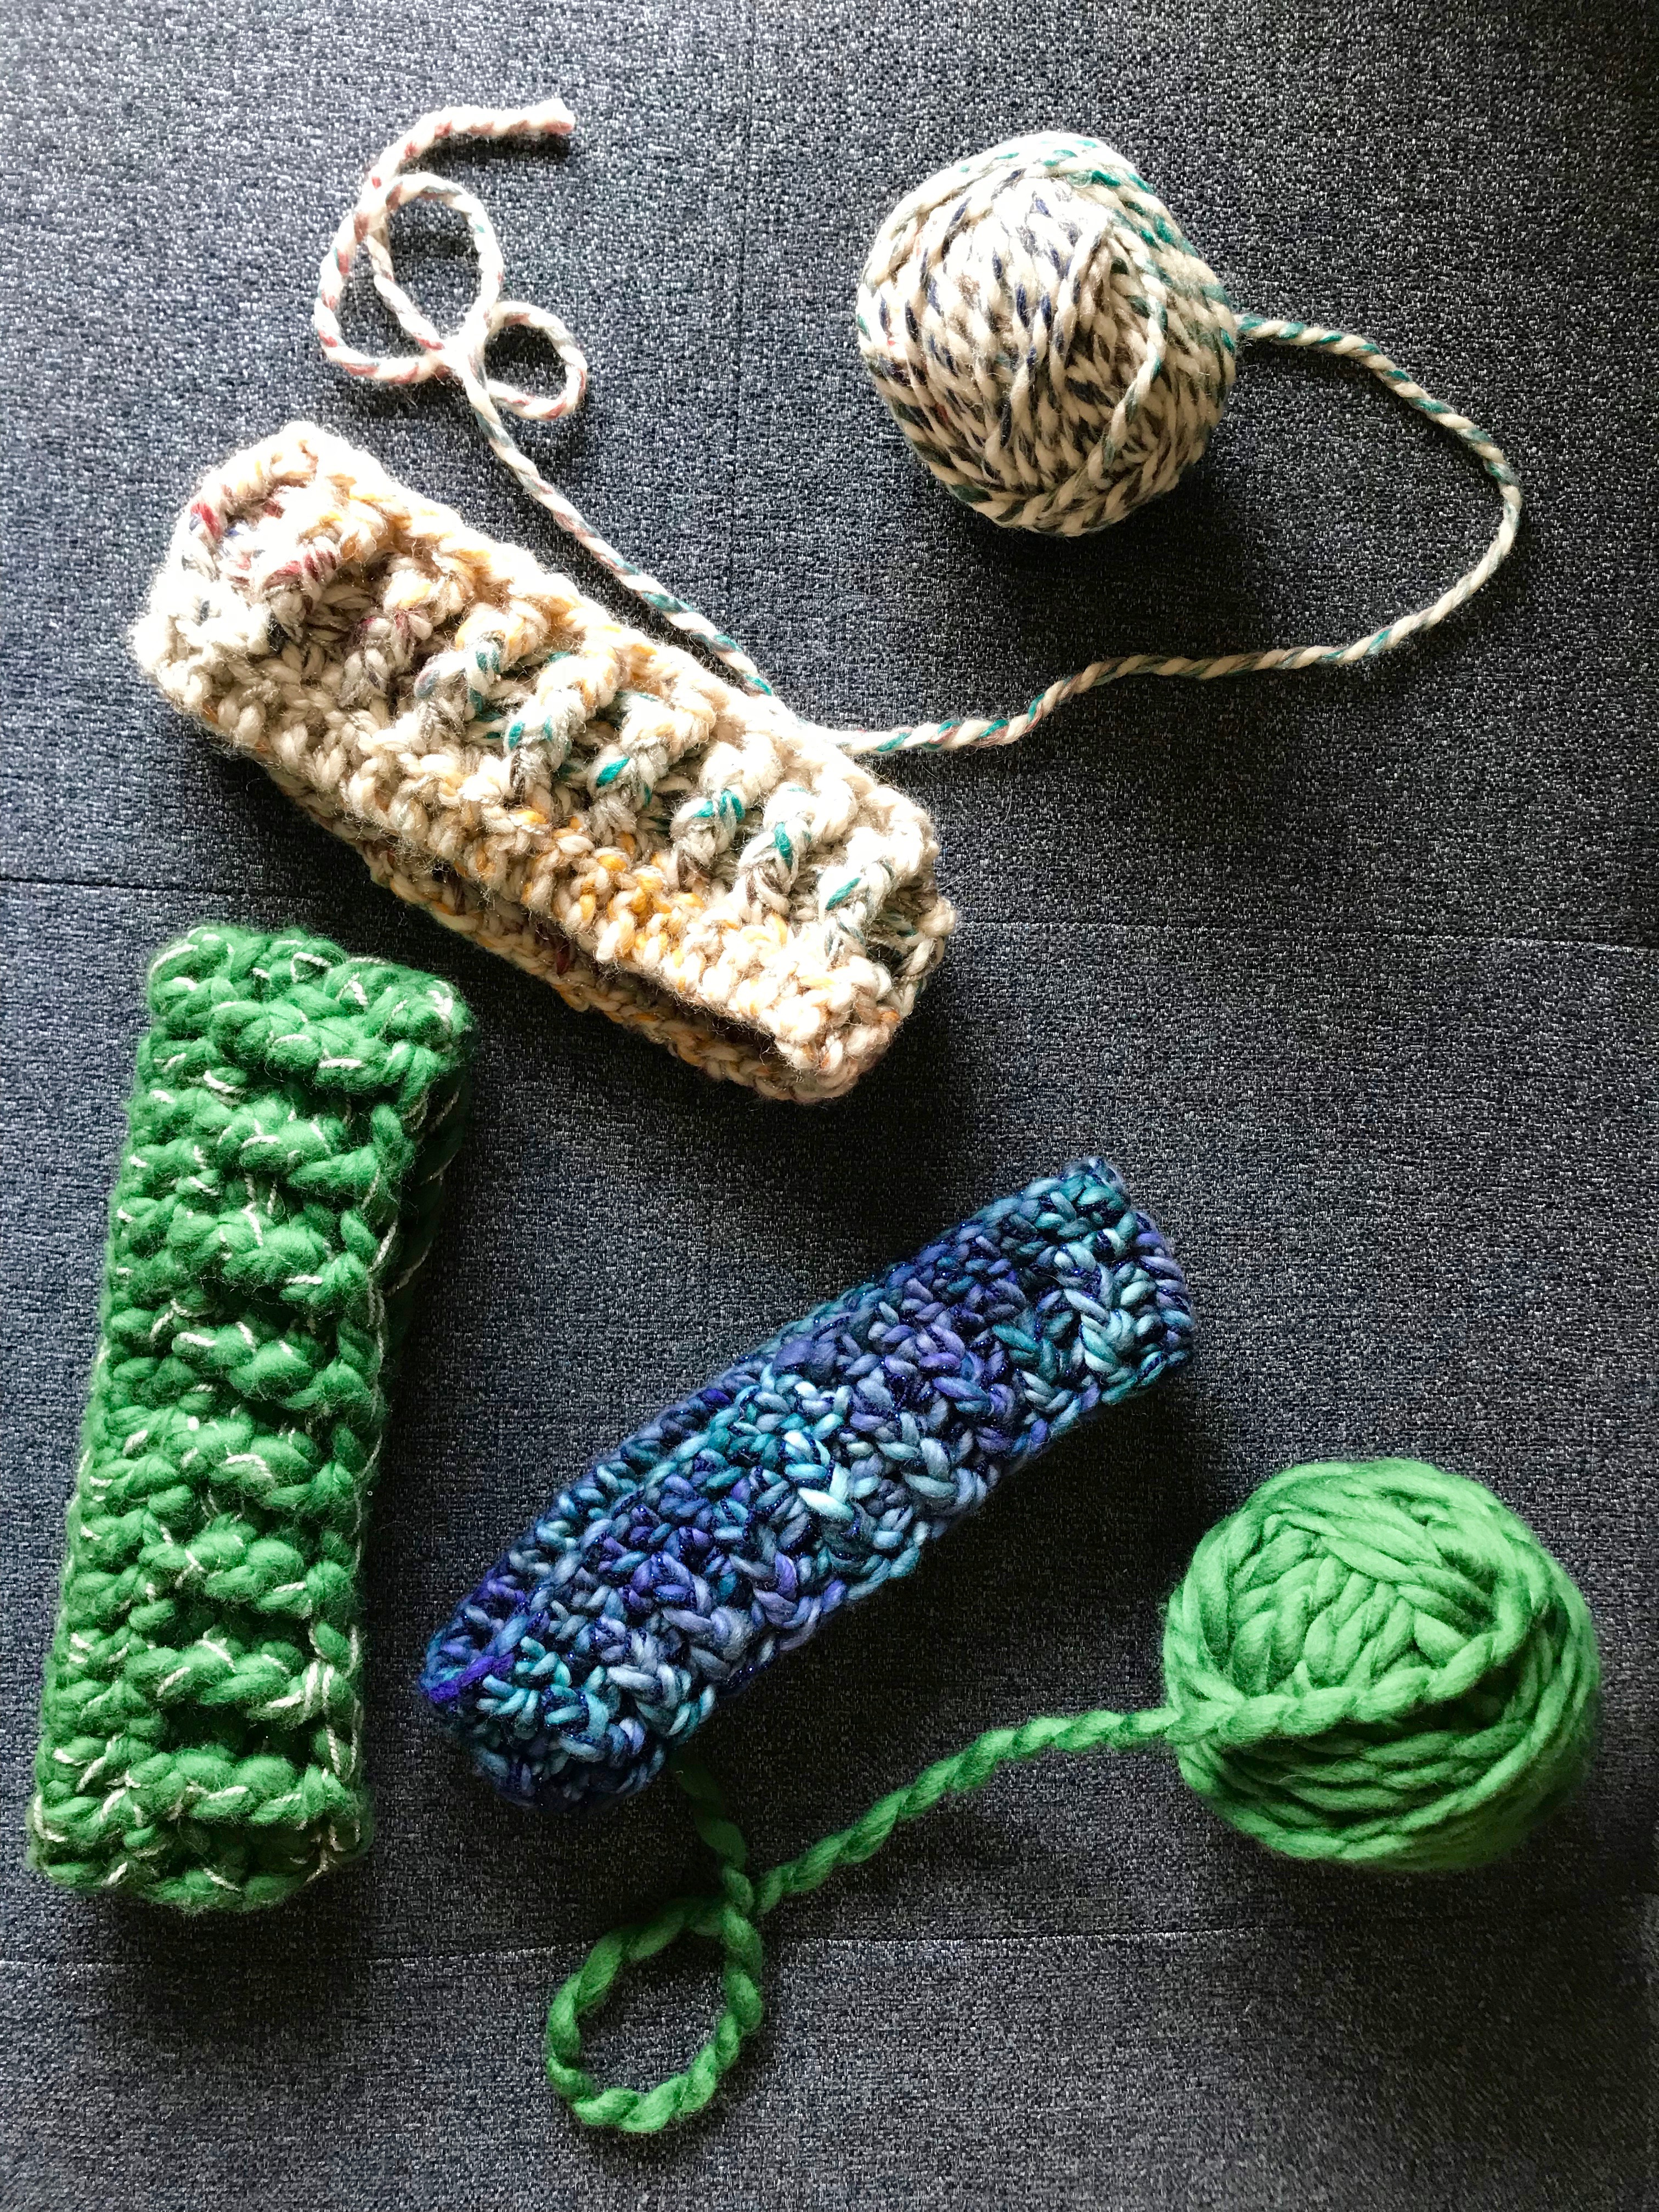
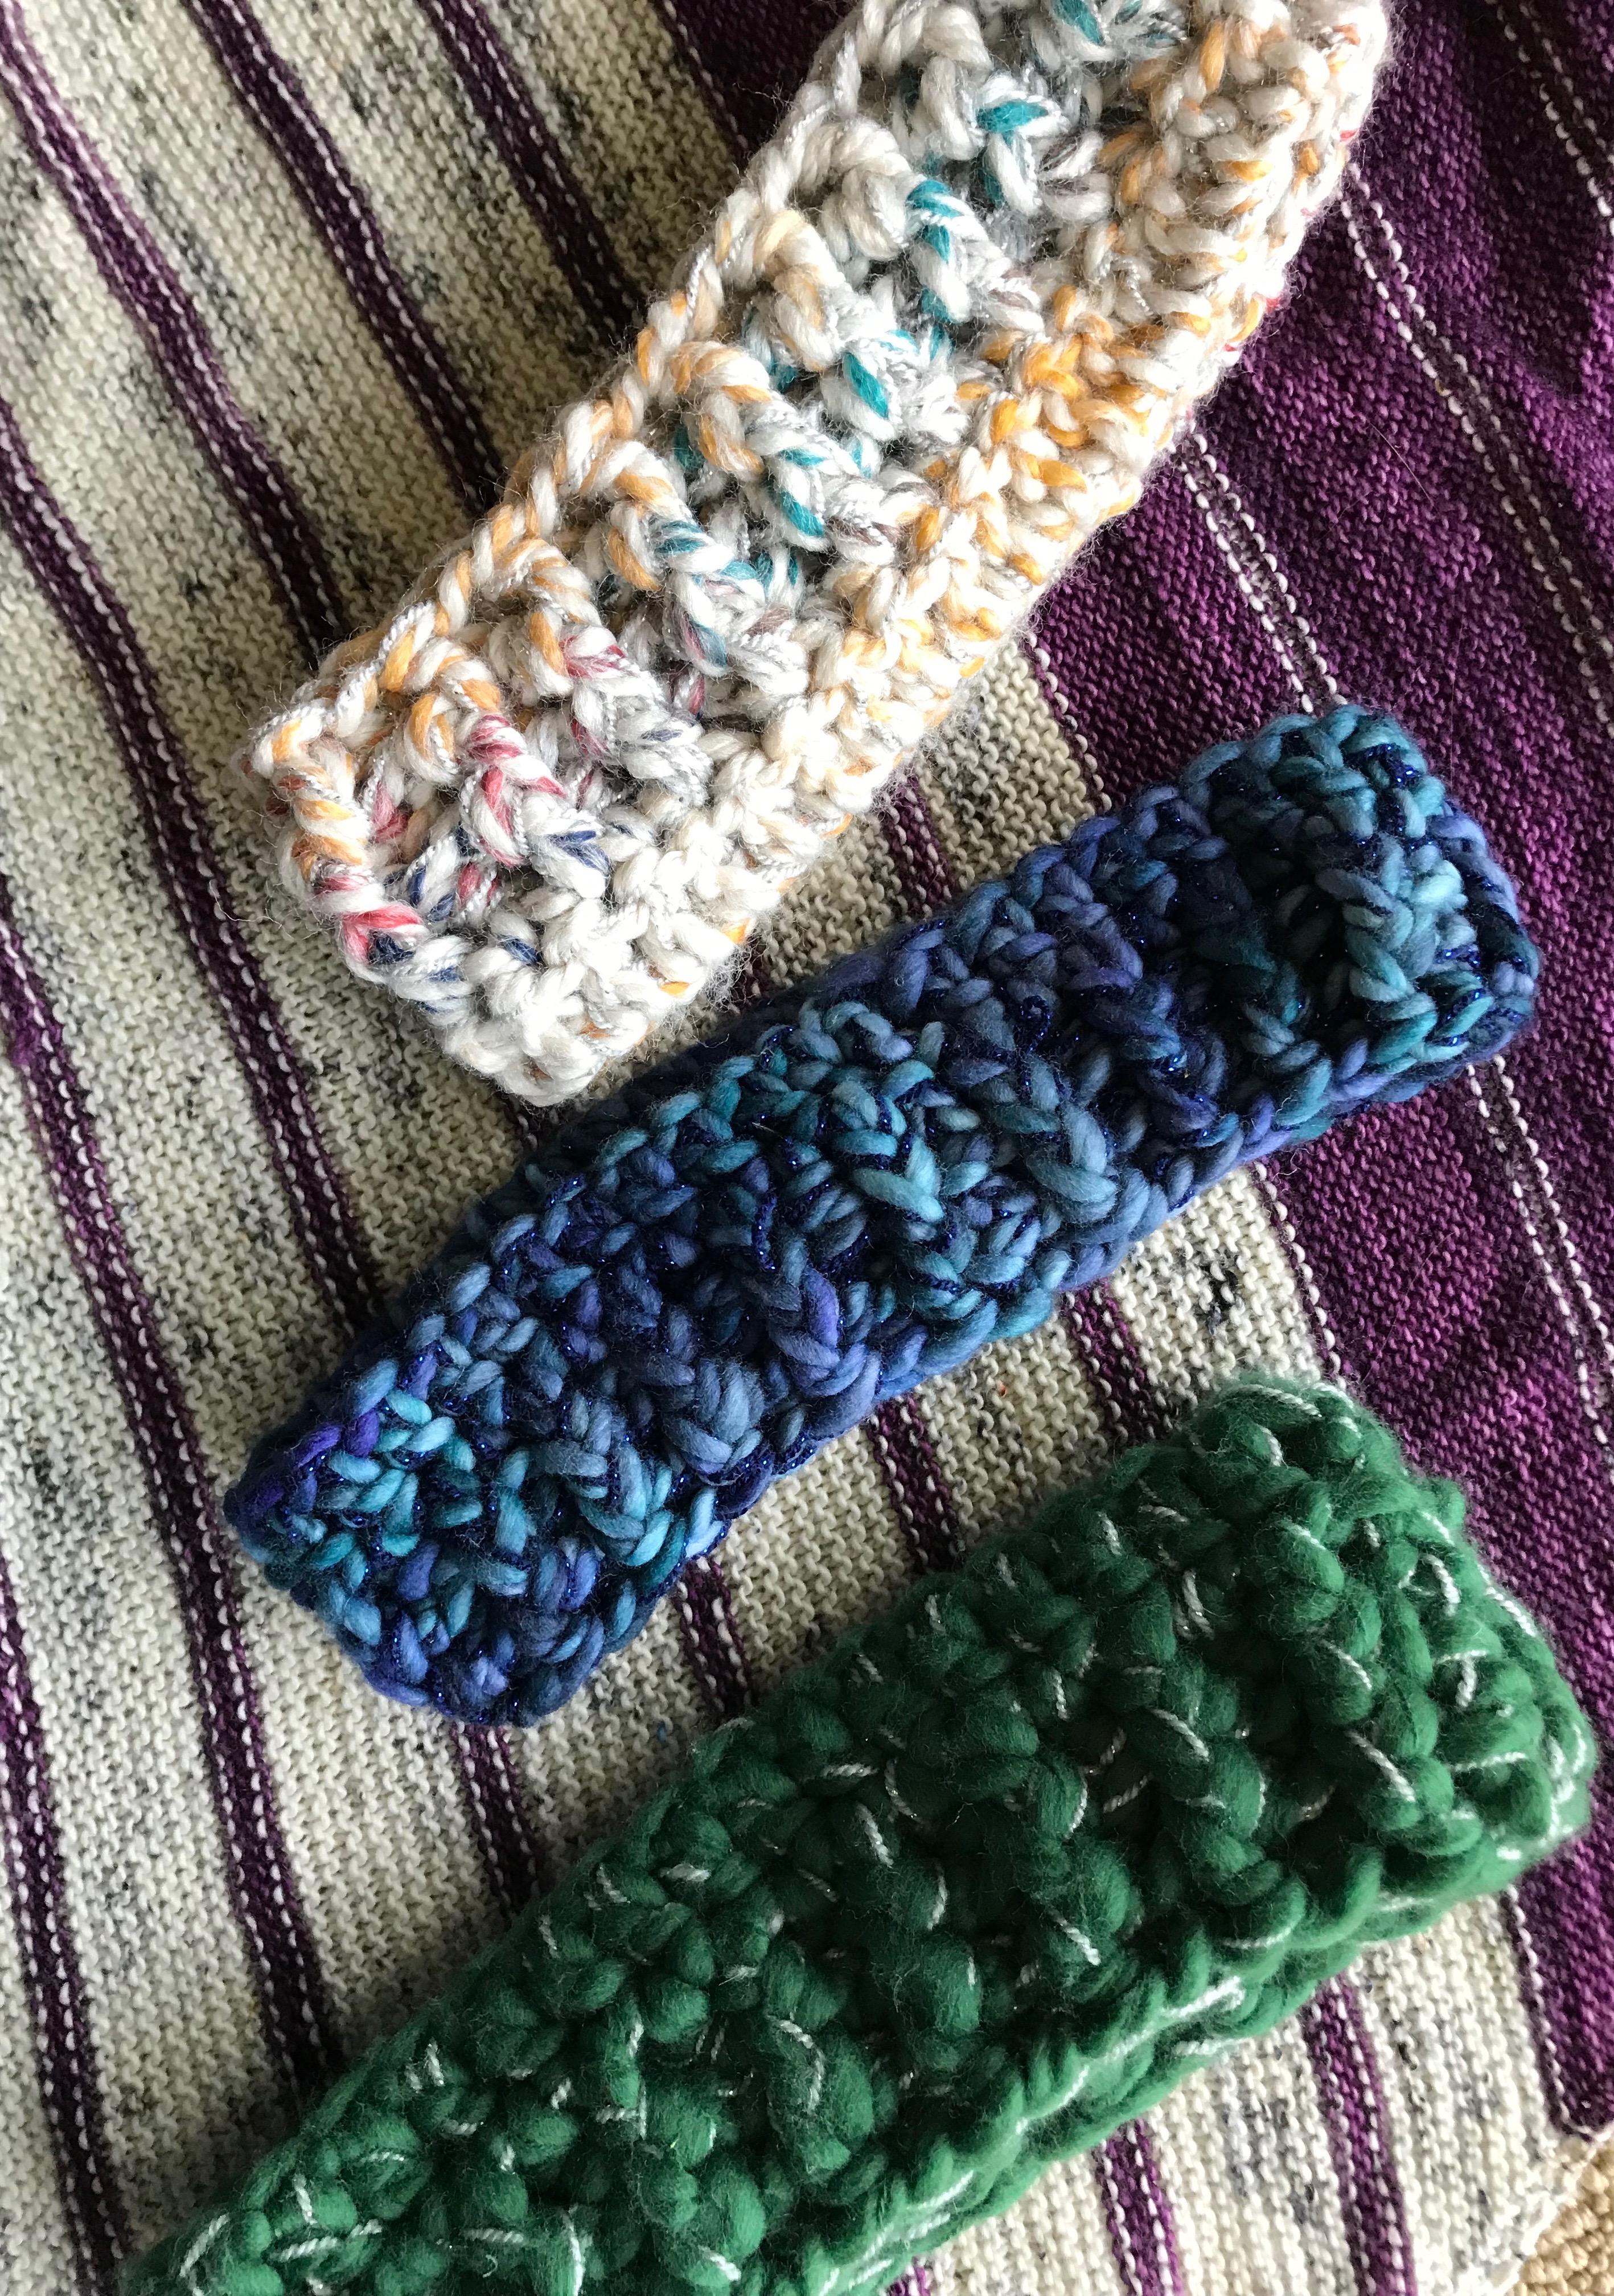
Row 1: ch 3, make 2 dc in 3 ch from hook, ch 2, make 3 dc in same sp, ch 2, make 3 dc in same sp, ch 2, make 3 dc in same sp, ch 2, sl st to join in top of starting ch.

Row 2: ch 3, make 2 dc in same sp as ch, *ch 1, sk 1 ch sp, 3 dc, ch 2, 3 dc in same sp* repeat between *s 2 more times, ch, sk 1 ch sp, 3 dc in next sp, ch 2, sl st to join into 3rd ch of start.

Rows 3 – ? : repeat rows 2 and 3 as needed around until squares reach determined size. Finish off.

Remember to make 3 dc in each edge ch sp, and 2 sets of 3 dc in each corner 2 ch sp

Attach the squares using a whip stitch:

Attach Front/Back Squares

1. Overlay the granny squares so that right sides are facing.

2. Select one side to be the top, where the neckline will be Sew 3” in from each end of the top edge to create what will become the shoulders. You should have an 16″ opening for the neckline.

3. Starting at the very bottom of one side (opposite the neckline), sew along the edge until you have left a 6″ hole for your arm. That said- you can make the arm holes larger or smaller as needed for your desired fit. Repeat on the other side

Sleeves

With right sides together, insert hook into the top of the first space located at the base of one arm hole. You will create the sleeve by crocheting into the granny square stitches around the arm opening only.

We will be continuing the granny square pattern, only now in the round.

Row 1: ch 4, *dc 3 in next ch sp, ch 1, repeat from * around. When you reach the starting 4 ch, make 2 dc into the space, then sl st into the 3rd ch to join

Row 2: repeat row 1

Row 3: ch 1, sc around

Row 4: repeat row 3

Repeat on second side. For longer sleeves, repeat row 2 as desired before finishing rows 3 and 4
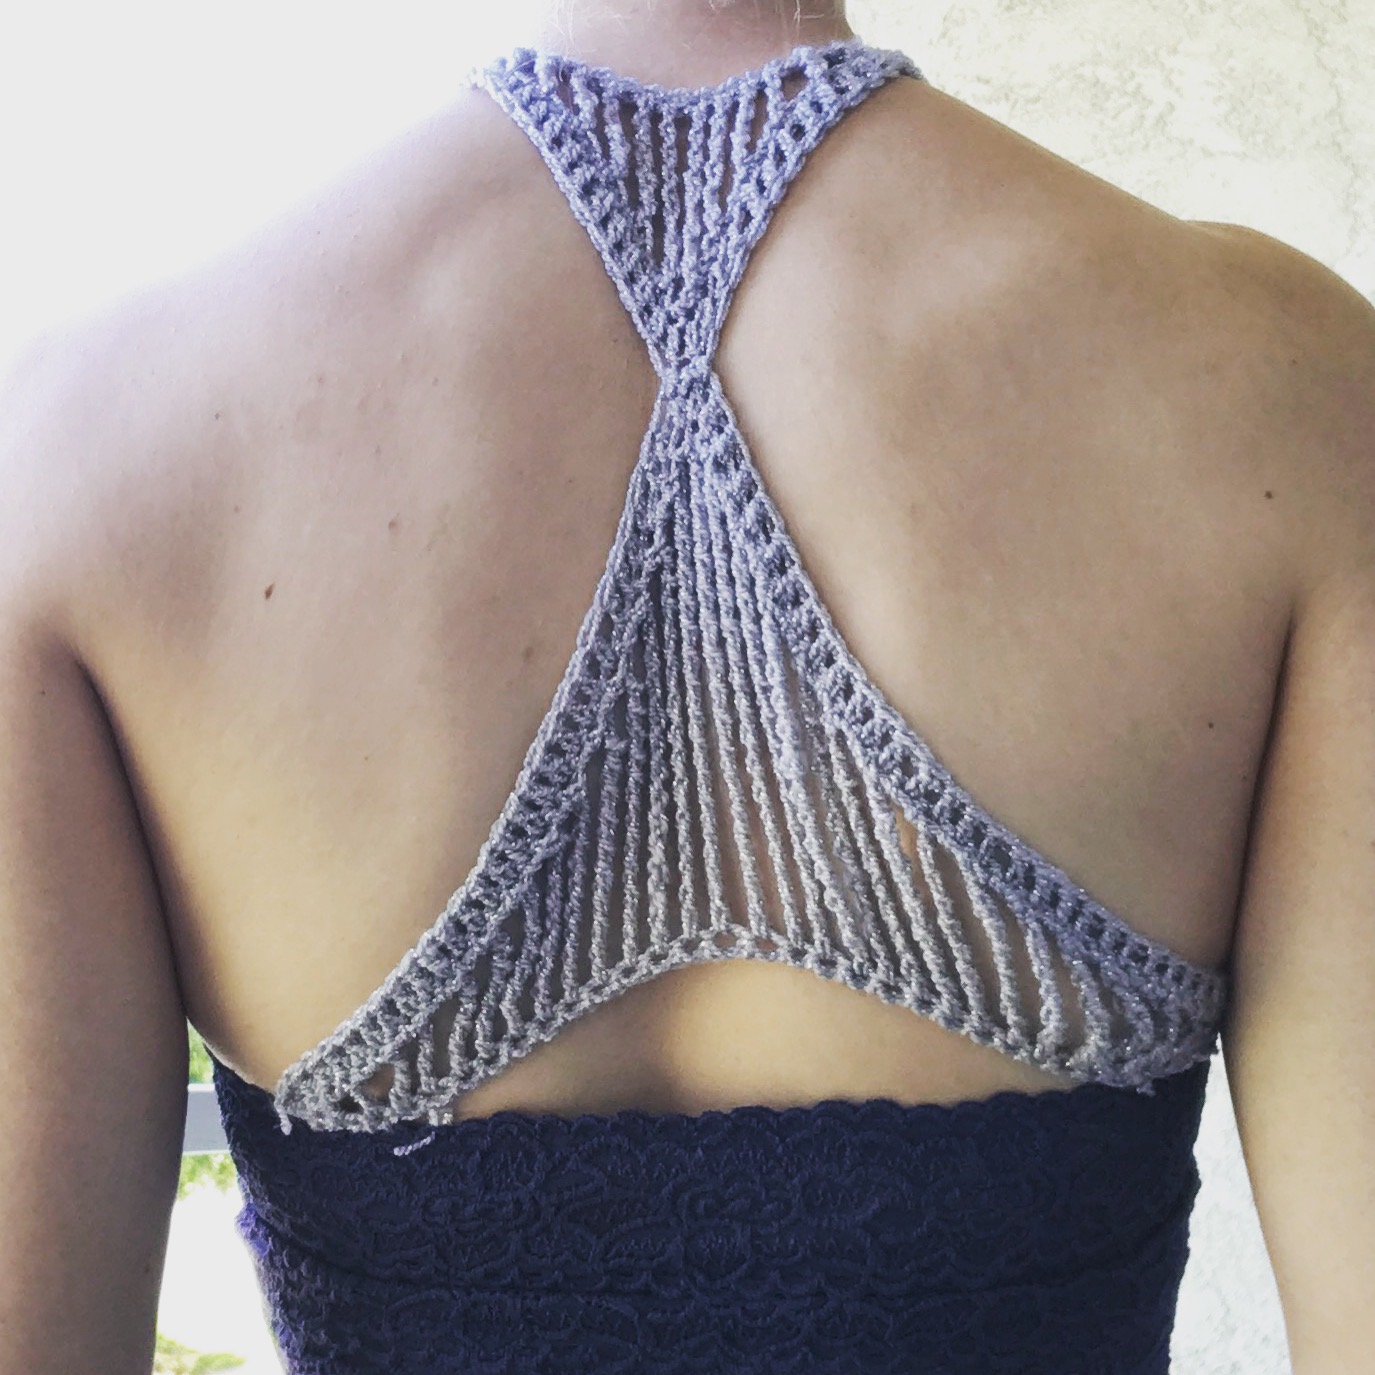
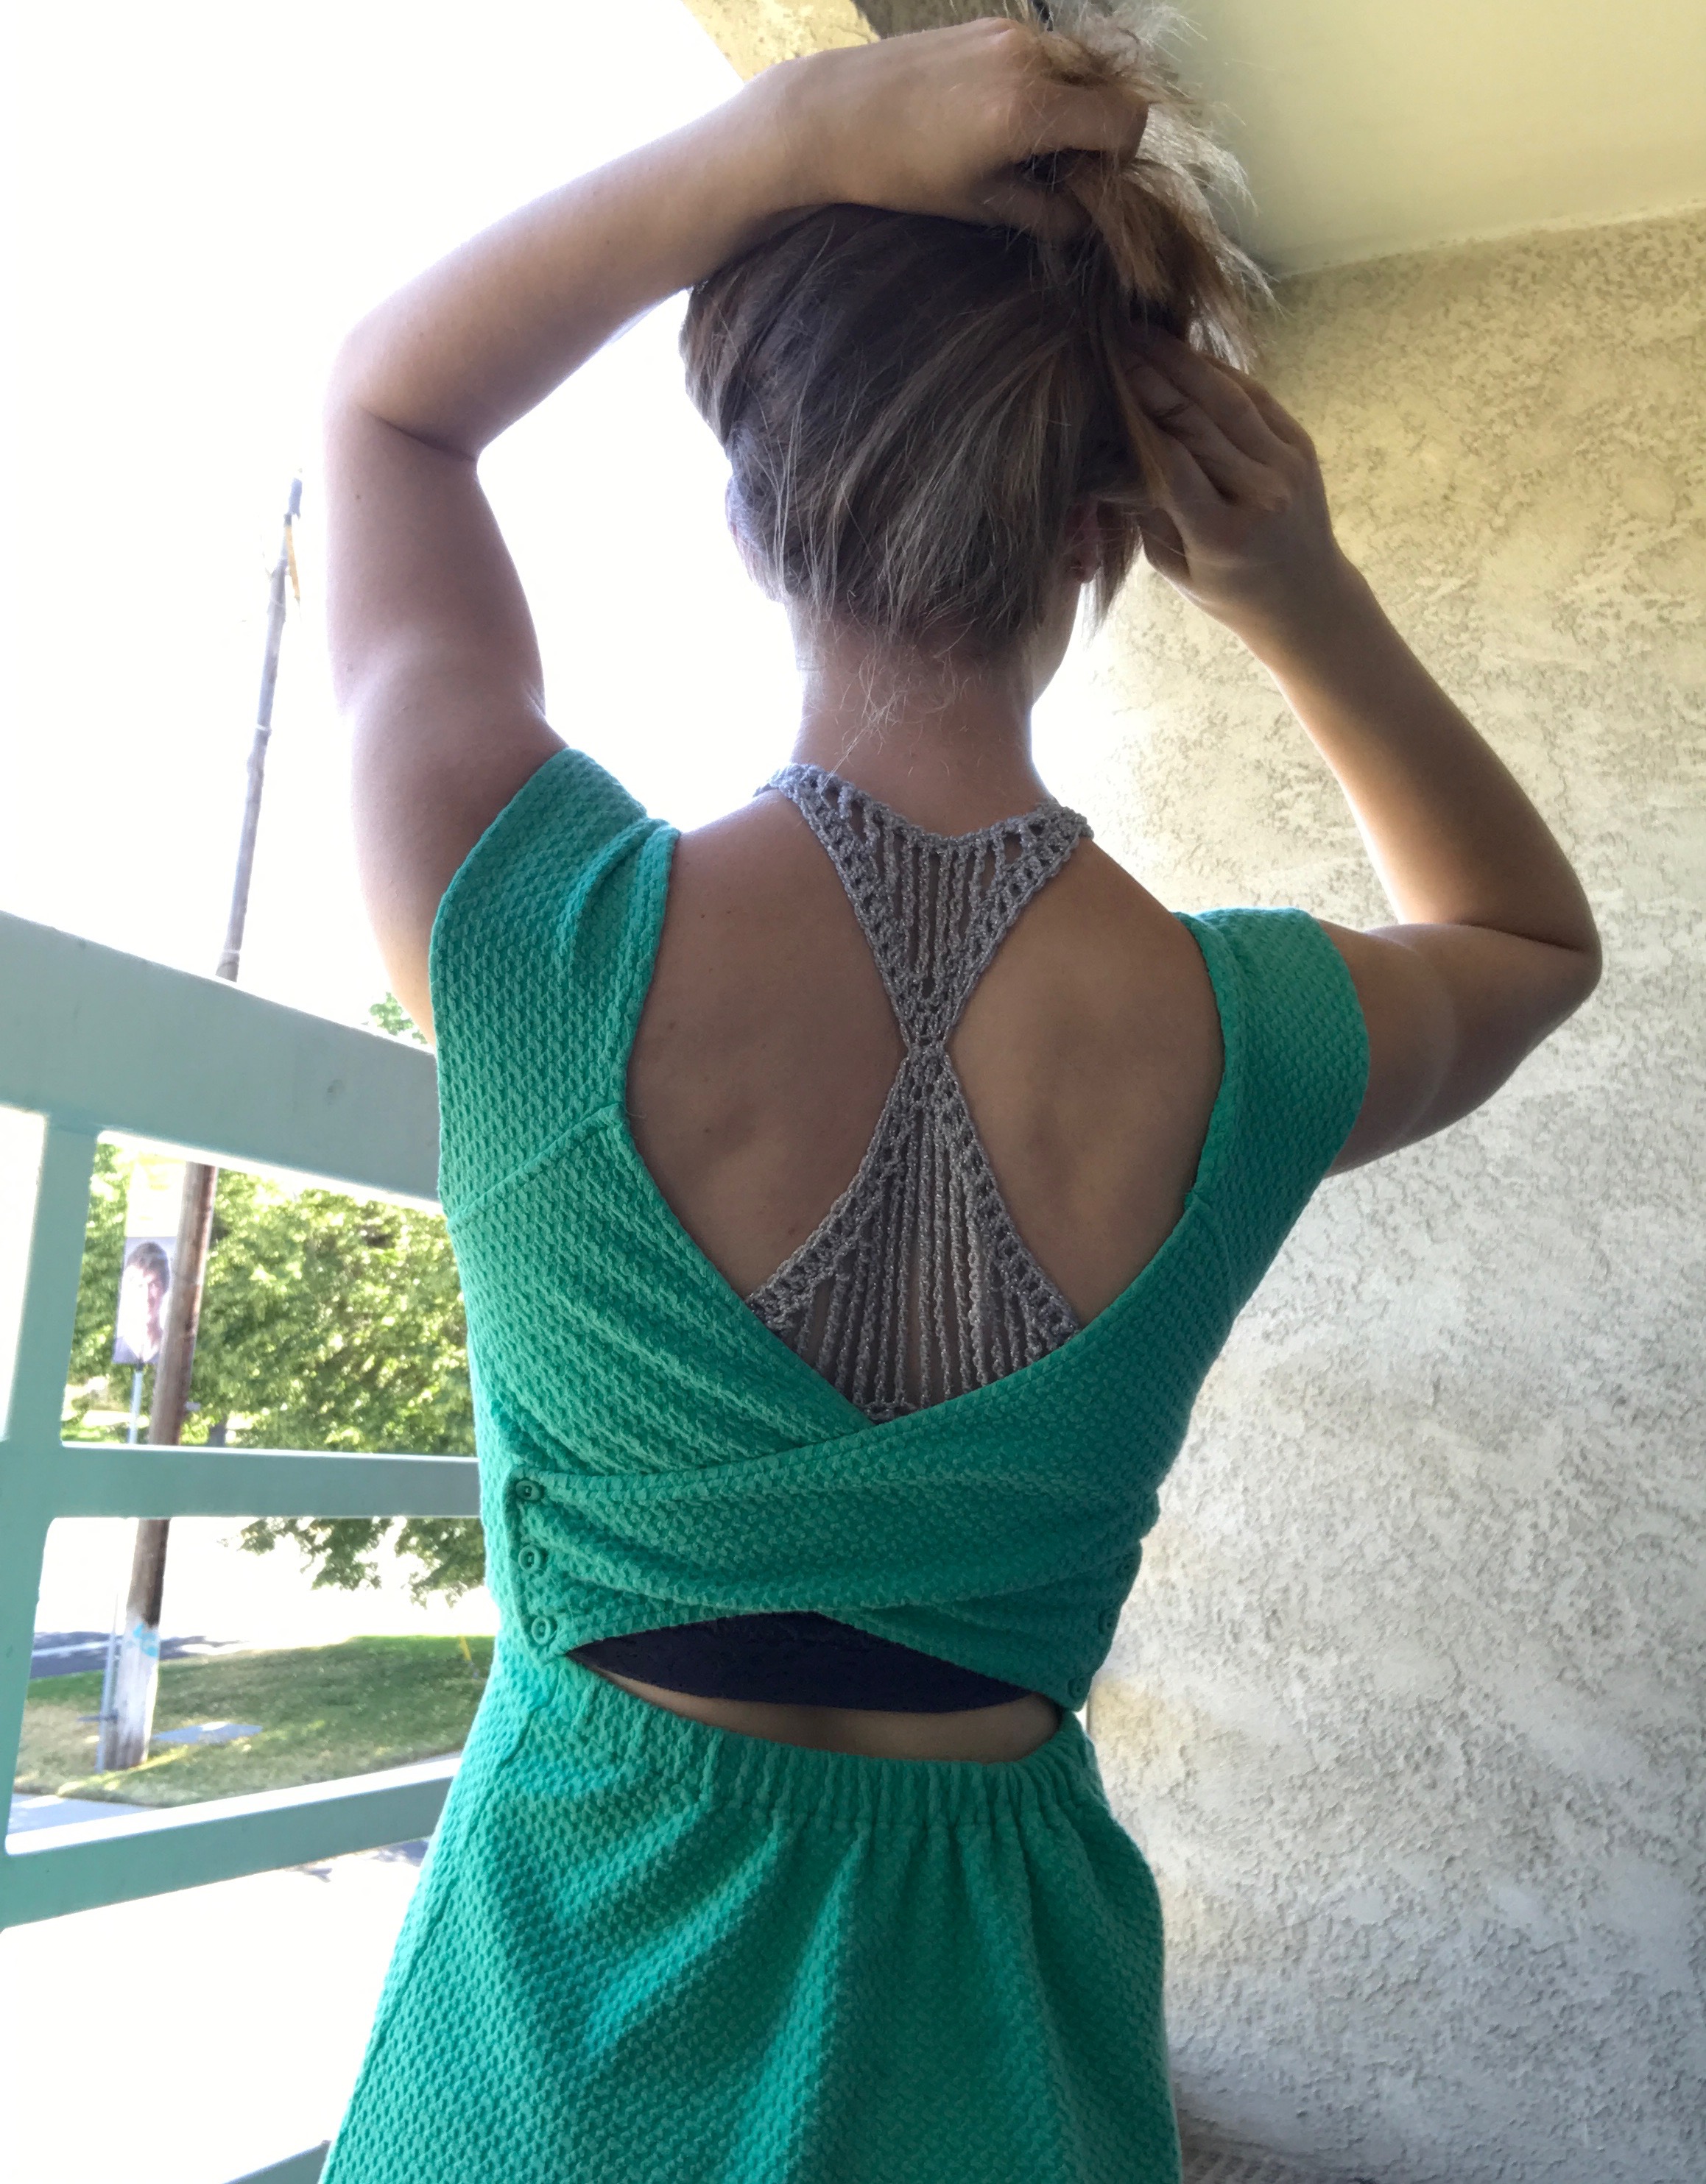
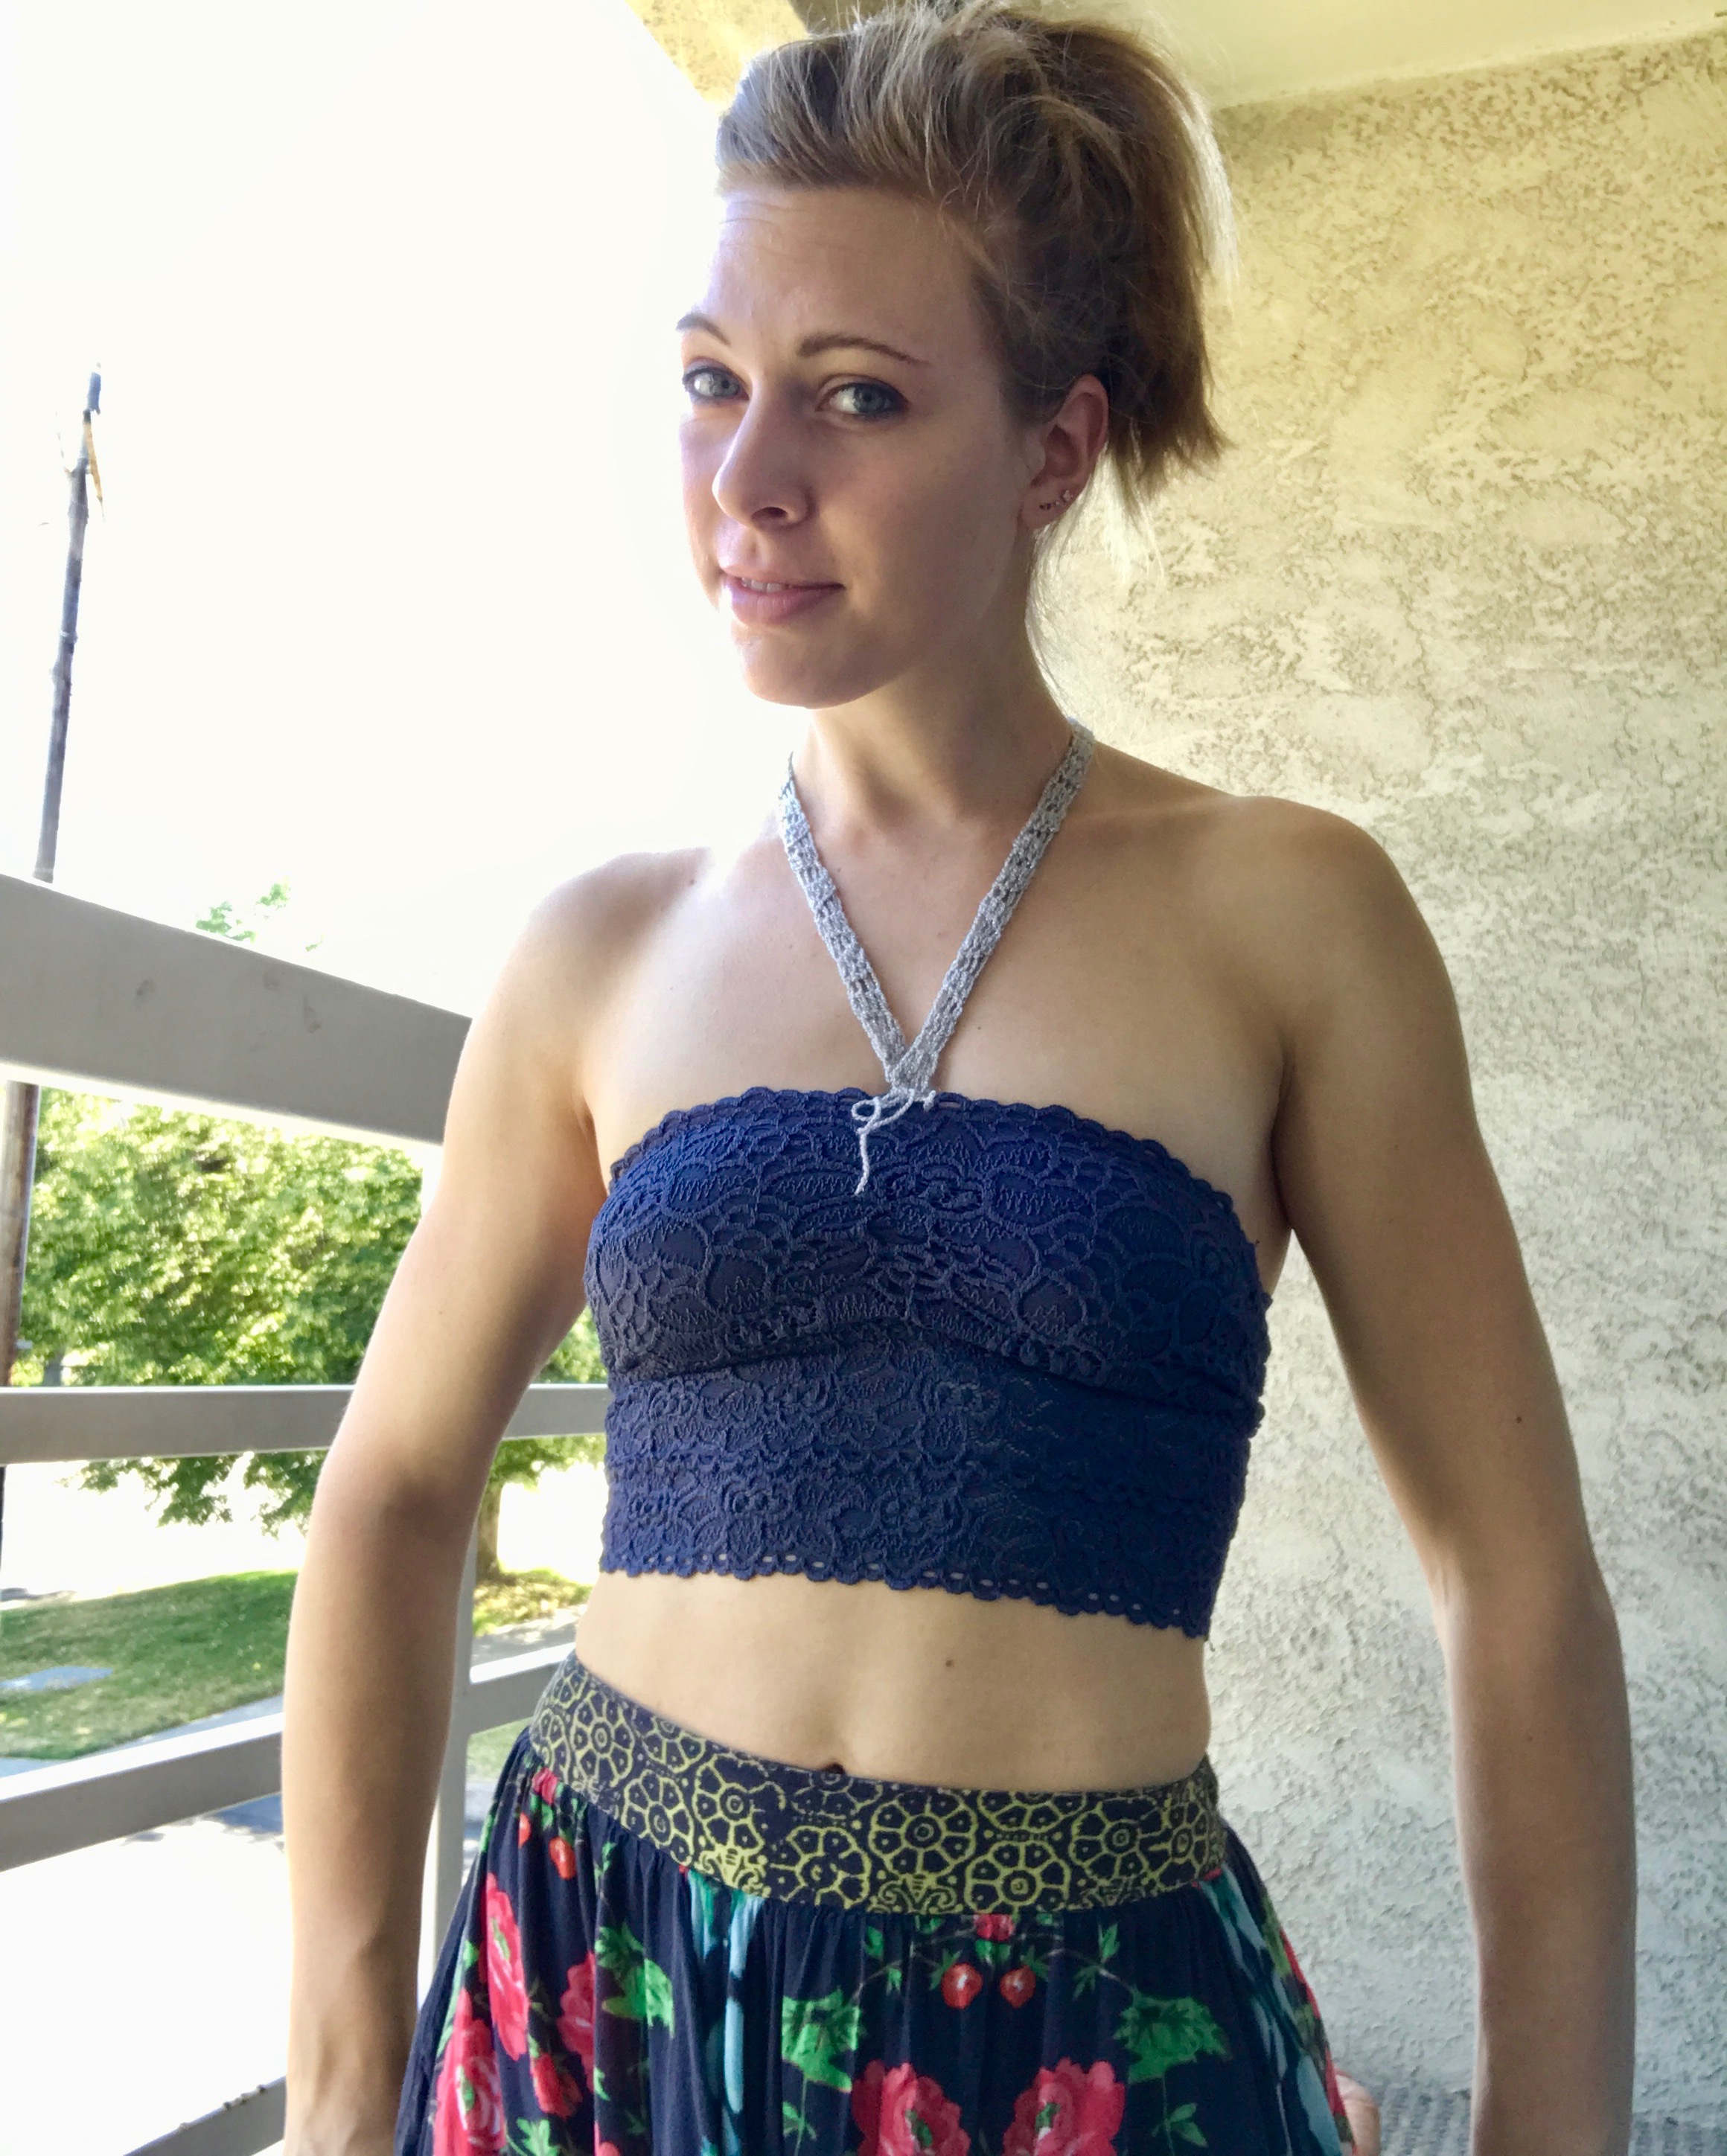
Neckline

Turn sweater inside out.

Insert hook into the top of the sweater at one of the side seams where you have sewn to create the shoulders. Again, you will be crocheting into the edge of the granny square.

String sequins onto the yarn until you have about 6 inches strung, when they are pressed together. Use an embroidery needle to help with this step

Row 1: ch 1, Sc around into the dc/ch sts of neckline, sliding 1-2 sequins in between each stitch.

Rows 2-5: Sc around

Finish off.

Bottom Trim

Turn fabric right side out so that the right sides are facing out. Insert hook into the bottom of the sweater at one of the side seams. Crochet into the st of the granny square.

Row 1: ch2, dc in each st around

Row 2: ch 2, *2 bpdc, 1 fp dc, repeat from * around

Row 3-4: repeat row 2, finish off.

The bpdc of rows 3 and 4 should align with those in row 2, this is what will give you the ridging. If you have to cheat to force this, I won’t judge, it is better than having the ridges be out of alignment

Tucks

Make sure sweater is right side out. Choose a side to be the front.

You will create two tucks just under the bust, along where an empire waistline would fall. It actually helps to be wearing the sweater while you do this, so that you can maintain the symmetry.

Pinch a fold of the fabric 2″ in from the side seam, about 10.5″ up from the bottom of the sweater. Use your other hand to pinch another fold of the fabric 5″ in from the side seam, and 10.5″ up from the bottom. Sew to join the two folds then repeat on the second side

Flip sweater over

Find the center of the square. Pinch 2.5″ left and 2.5″ right of the center, then use yarn and yarn needle to join both of these folds.

Design a site like this with WordPress.com
Get started